Put on Iaido clothes — complete guide
Warakiri Battosai‹ (= swordsman slashing straw) shows in several steps how to put on Iaido clothing correctly. Unfortunately the following movie is in Japanese. You can get a basic understanding of what it is about. YouTube allows to show automatically translated subtitles with sometimes strange translations. Otherwise: watch carefully.
The individual steps
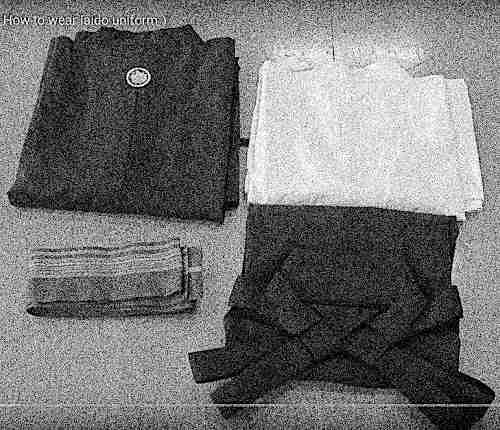
- Overview of the clothing parts 1:35.
- Hadagi (undershirt) at 2:25. Tie the right way around at 3:00.
- Iai-Dogi (jacket) with cool embroidery from 3:05.
- Iaiobi tie from 4:25. Summary: the long belt can be turned over three times (depends on the waist size, this on the training intensity).
- The end knot is a nice variant. There are many types of knots, however, ask your Sensei 6:20.
- Pull in the belly a little and move the knot to the back 7:30:
- Der Hakama comes into play (still with fancy decorative knots) 7:40. Ingenious trick to unfold at 8:00.
- At 9:15 the Sensei shows a nice rollover of the fastening straps in front.
- Knot the long ribbons of the back Hakama part at the front 10:30.
- How to create a nice decorative knot from the remnants of the ribbon at 11:15.
- Finally, pull the clothing of the top straight down 12:15. Should also be done from time to time during training.
- A few pointers to the correct Hakama length from 12:50.
- If you are a two-sword samurai there are hints in which position to insert the swords into the obi 14:30. Correct plugging in ›only‹ an Iaito works well, of course.
One more thing
How to fold the Hakama with cool tie knots (of course train beforehand). Some more things: the meaning of the folds of the hakama are explained, nicely with faded in English subtitles.